Welcome to the Marketing Module Mastering Guide
This article will help you become proficient in utilizing advanced features of the Marketing Module, including importing contacts, creating campaigns, targeting audiences, setting up triggers, scheduling messages, and setting campaign goals.
Importing Your Contacts
To get started, import your contacts into the Marketing Module:
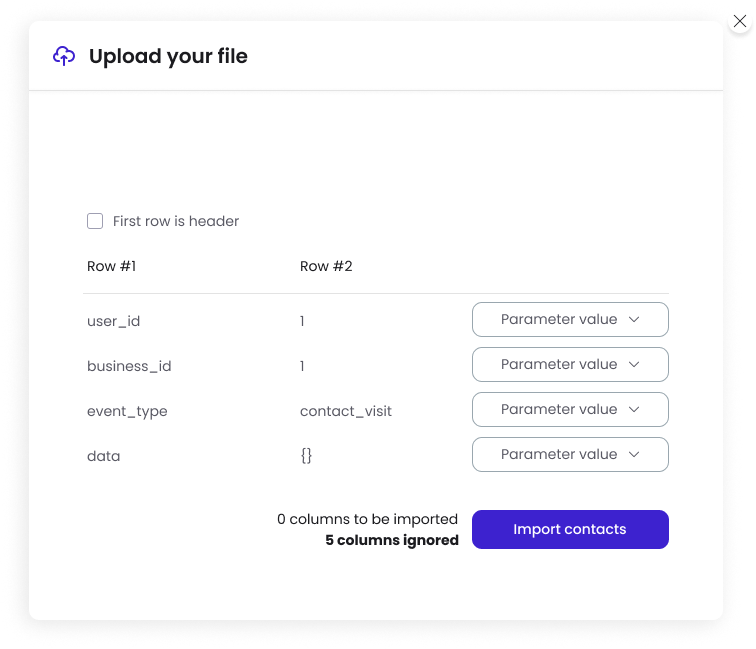
Import from a File:
- Go to the Contacts option in Customers.
- Click on the Import button.
- Upload your contact file, match the fields during mapping, and fill in your contacts from the file.
For a detailed guide, visit Import Contacts.
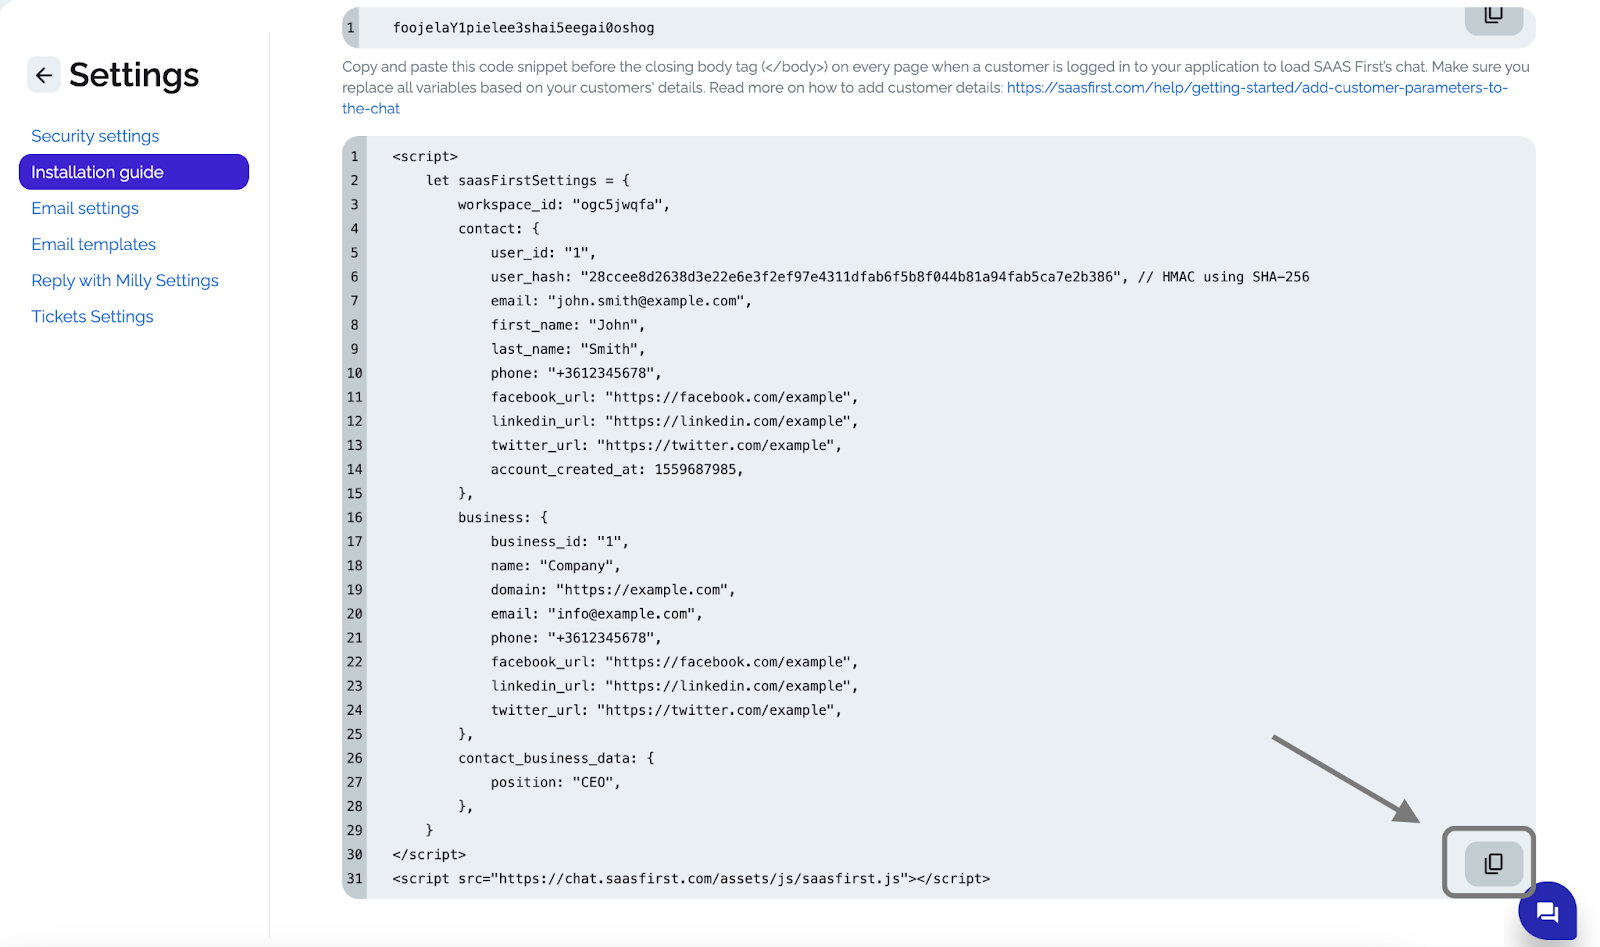
Import from Live Chat:
- Install the live chat on your website so that all logged-in customers are automatically added to your contacts.
- Find the Installation Guide in the Inbox Setup, copy the code, and paste it into your website.
For more information, visit Live Chat Installation.
Creating Your First Campaign
Create your first chat or popup marketing campaign for your contacts:
Choose Campaign Type:
- In the Marketing Module, decide whether you want to create a chat or popup marketing message.
- For a chat marketing message, click on Chat message.
- For a popup marketing message, click on Popup message.
Filtering Your Audience
Hypertarget your audience using filters to segment them effectively:
Add Filters:
- Click on the plus sign to add a new filter.
- Choose parameters related to your contacts, businesses, contact-business relations, and events.
- Enter the relevant data to select your audience.
- Add more AND/OR relations by clicking on the + sign next to the added filter or on +Add more.
For more details, visit Chat Marketing Campaigns.

Setting Up Triggers for Your Messages
Determine specific triggers for sending your messages:
- Choose Triggers:
- Set triggers based on:
- Specific URL visits
- Cookie names and values
- Geolocation (country-specific)
- Actions (element sector and action type)
- API calls (API endpoint to trigger the message)
- Set triggers based on:

Writing the Content of Your Message
Create engaging content for your chat or popup marketing messages:
Chat Message Setup:
- Set up the title, category, sender, trigger delay, appearance, preview limit, and content.

Popup Message Setup:
- Set up the title, category, sender, trigger delay, popup settings (buttons, names, and action types), and content.

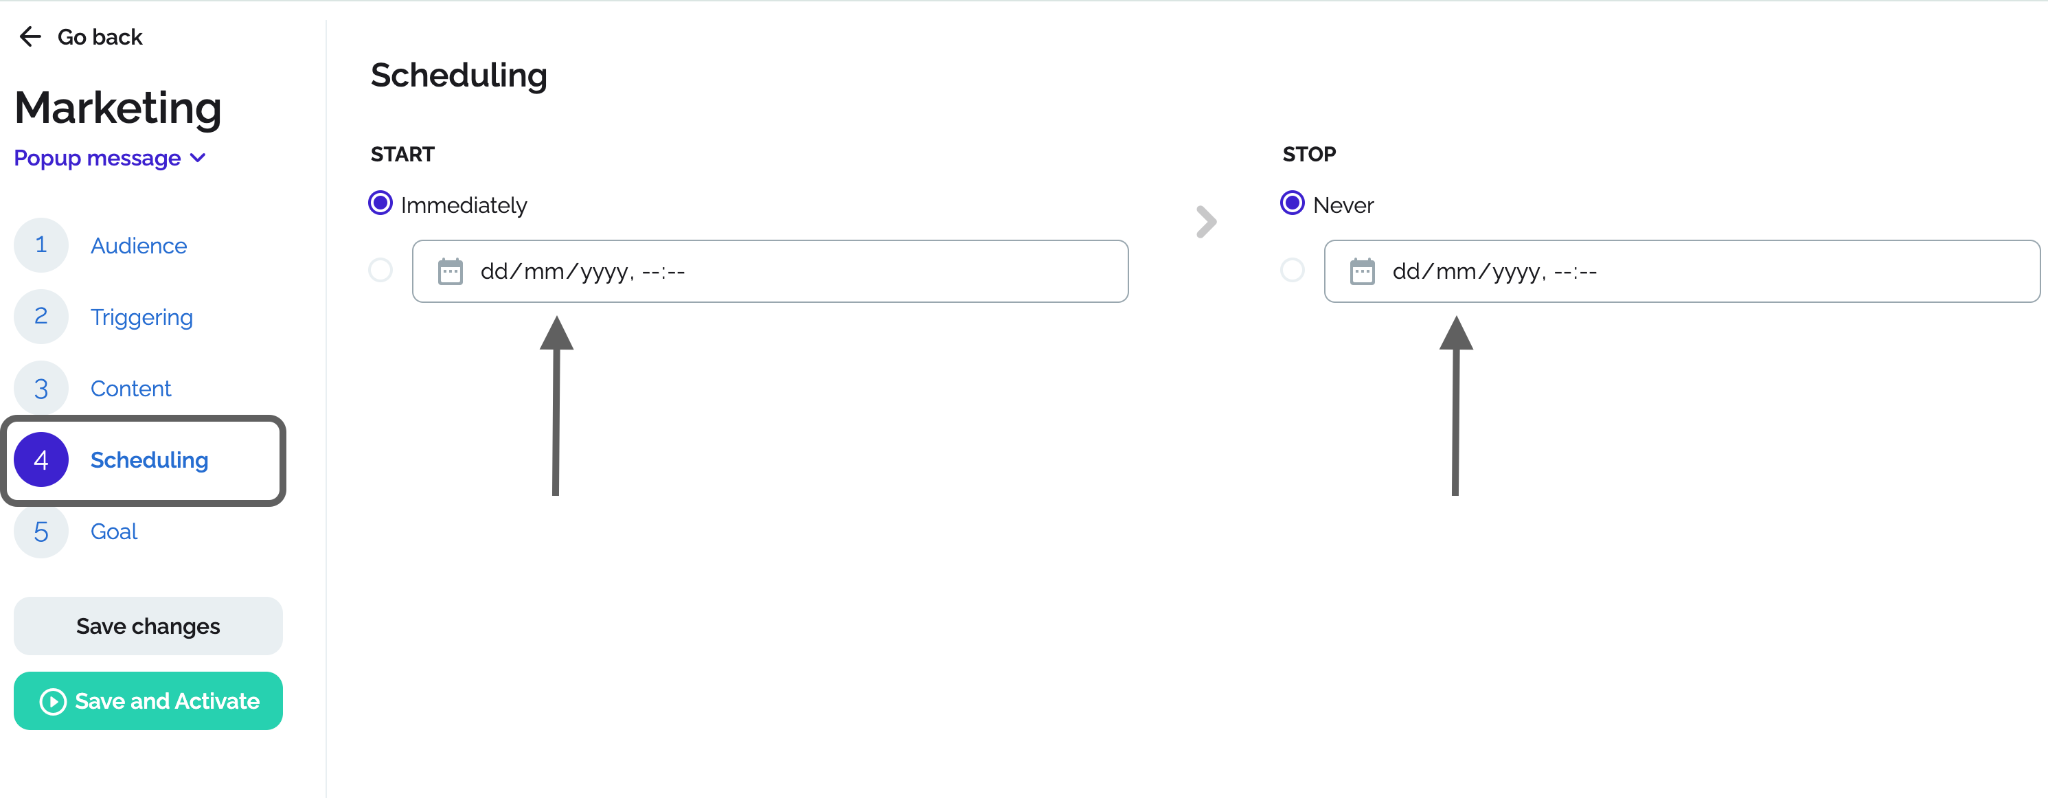
Scheduling Your Message
Schedule your messages to be sent at the optimal time:
- Schedule Options:
- Choose to send the message immediately or enter a specific date.
- Decide whether to never end the campaign or set a specific end date for dynamic campaigns.
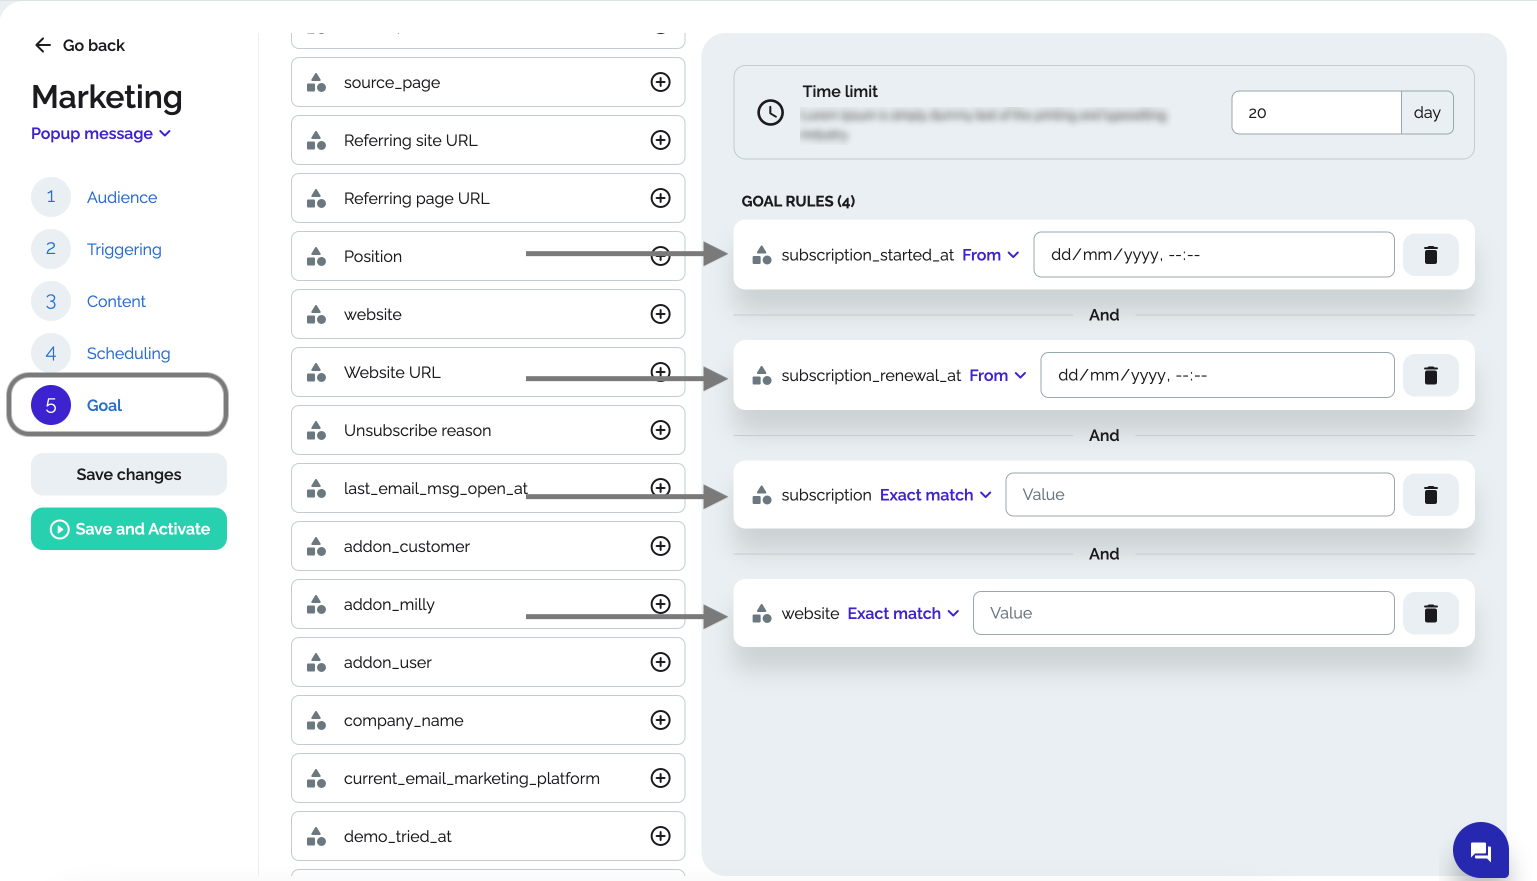
Setting Up Campaign Goals
Measure the success of your campaigns by setting goals:
Define Goals:
- Choose from several goals related to your contact parameters.
- Once set, you can monitor the success of your campaigns in the statistics section.
Activate Campaign:
- Click on Save and Activate to launch your campaign.