


Welcome to the Customers Module Mastering Guide
This article will help you become proficient in using the advanced features of the Customers Module. You will learn how to filter and search for customers, import contacts, install chat for logged-in customers, manage events, and handle business associations.
Installing the Chat for Logged-In Customers
To keep your customer contacts up-to-date using chat, follow these steps:
Import Option:
- On the Contacts page, click on Import and choose the "Keep contacts up-to-date using chat" option.
Access Inbox Setup:
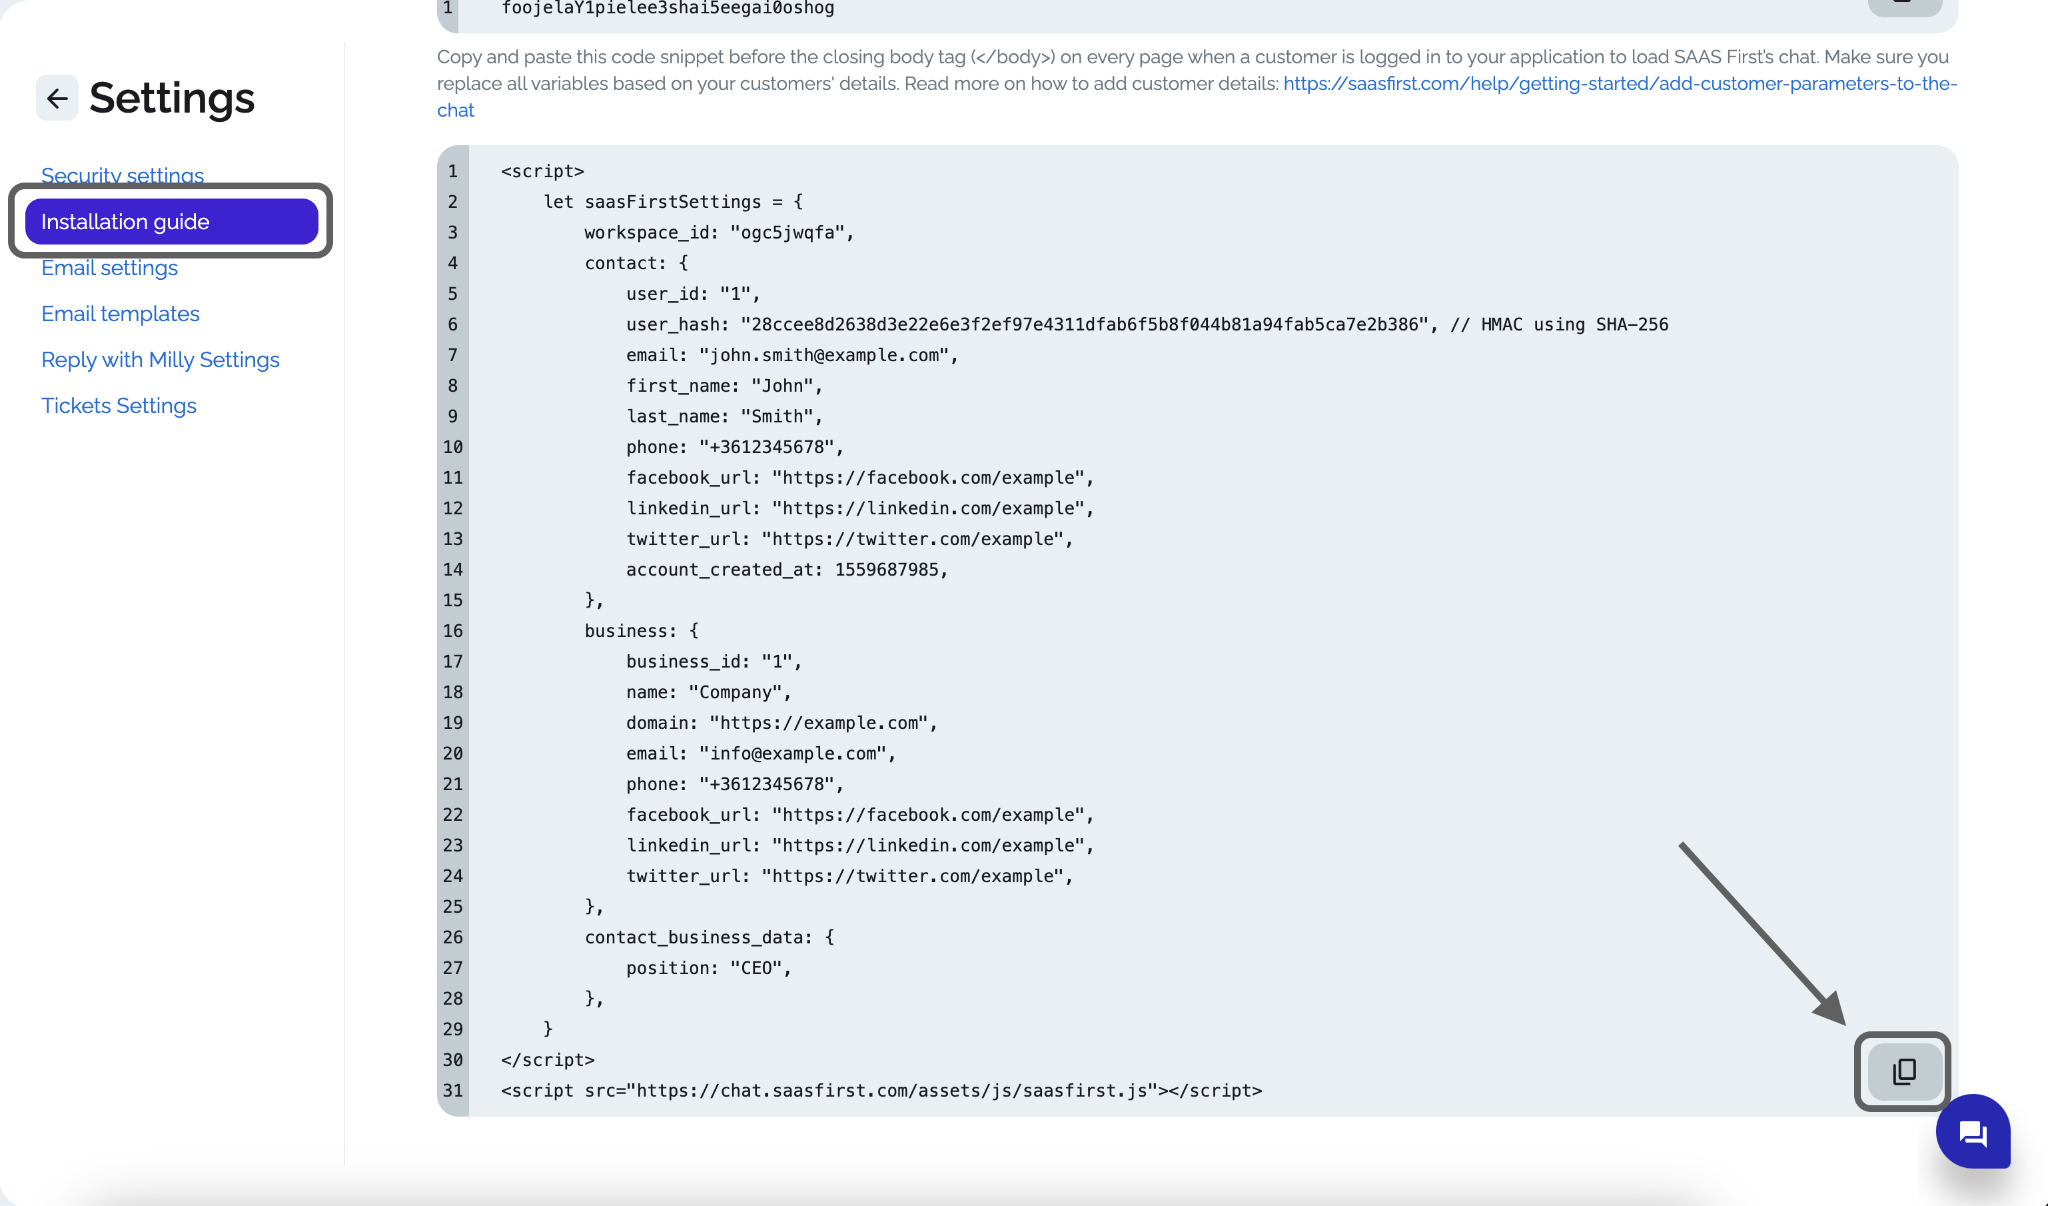
- In your Inbox Setup, go to Settings and find the Installation Guide.
Install Chat:
- Find the "Install Chat for Logged-in Customers" section.
- Copy and paste the code before the closing
</body>tag on every page to load SAAS First’s chat.
Verify Installation:
- Check your website to see how the live chat works.
- All your registered customers will be added to your Customers with their data via the chat.
Importing Your Contacts
You can easily import your contacts from a file:
Initiate Import:
- On the Contacts page, click on the Import button.
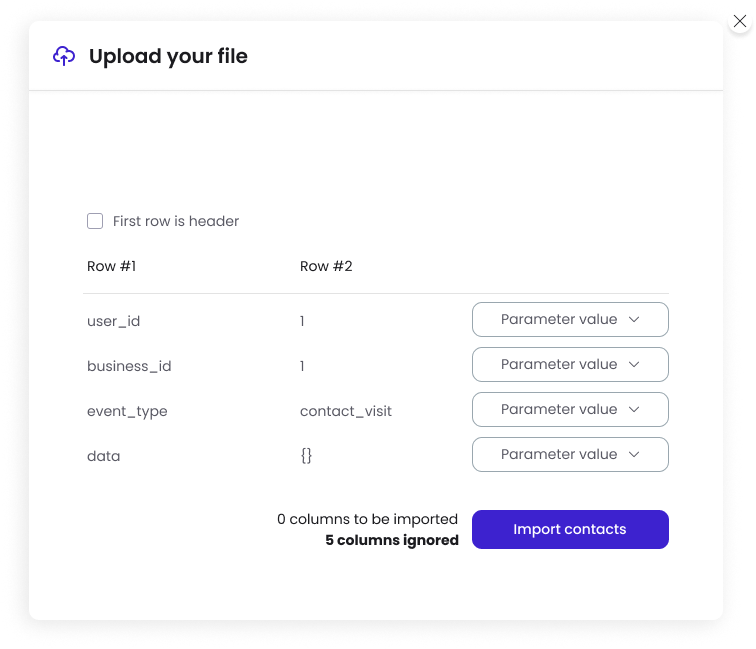
- Select the "Import contacts by uploading a file" option

Mapping Data:
- Match the rows and parameter values according to your file.
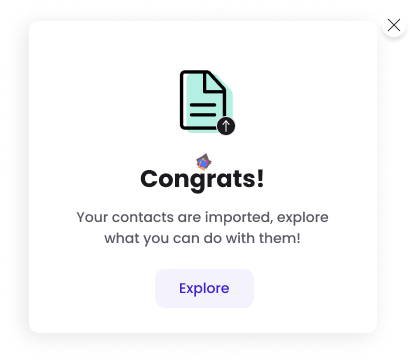
Complete Import:
- After the process finishes, you can view your imported contacts.
Filtering Your Contacts
To refine your search and target specific contacts, use filters:
Apply Filters:
- Click on the filter button and select the filter you want to apply on your Contacts, Businesses, Contact-Businesses relations, or Events.
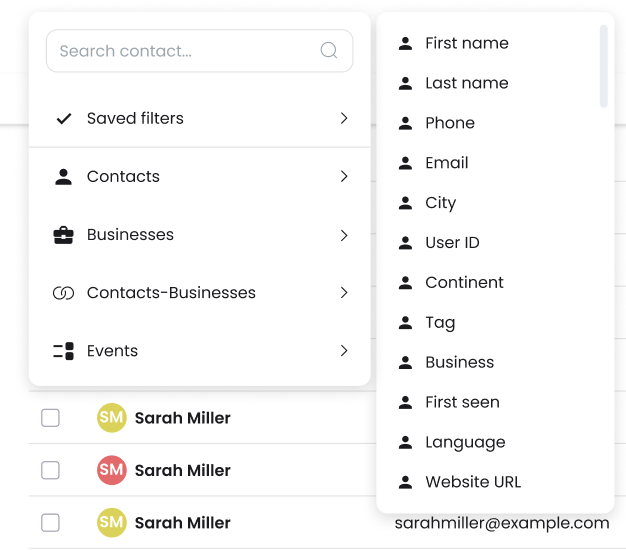
Match Data:
- Select the form of the entered data to match your criteria.
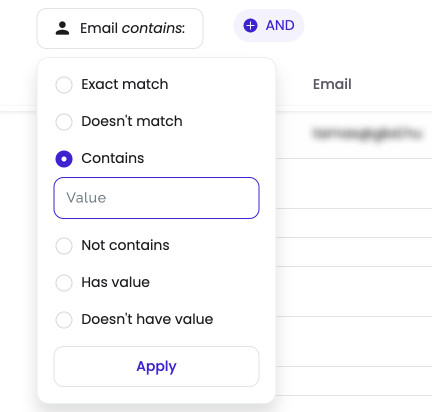
Create Connections:
- Create AND/OR connections in your filters depending on whether you want to refine your search further or add a new flow to the search.

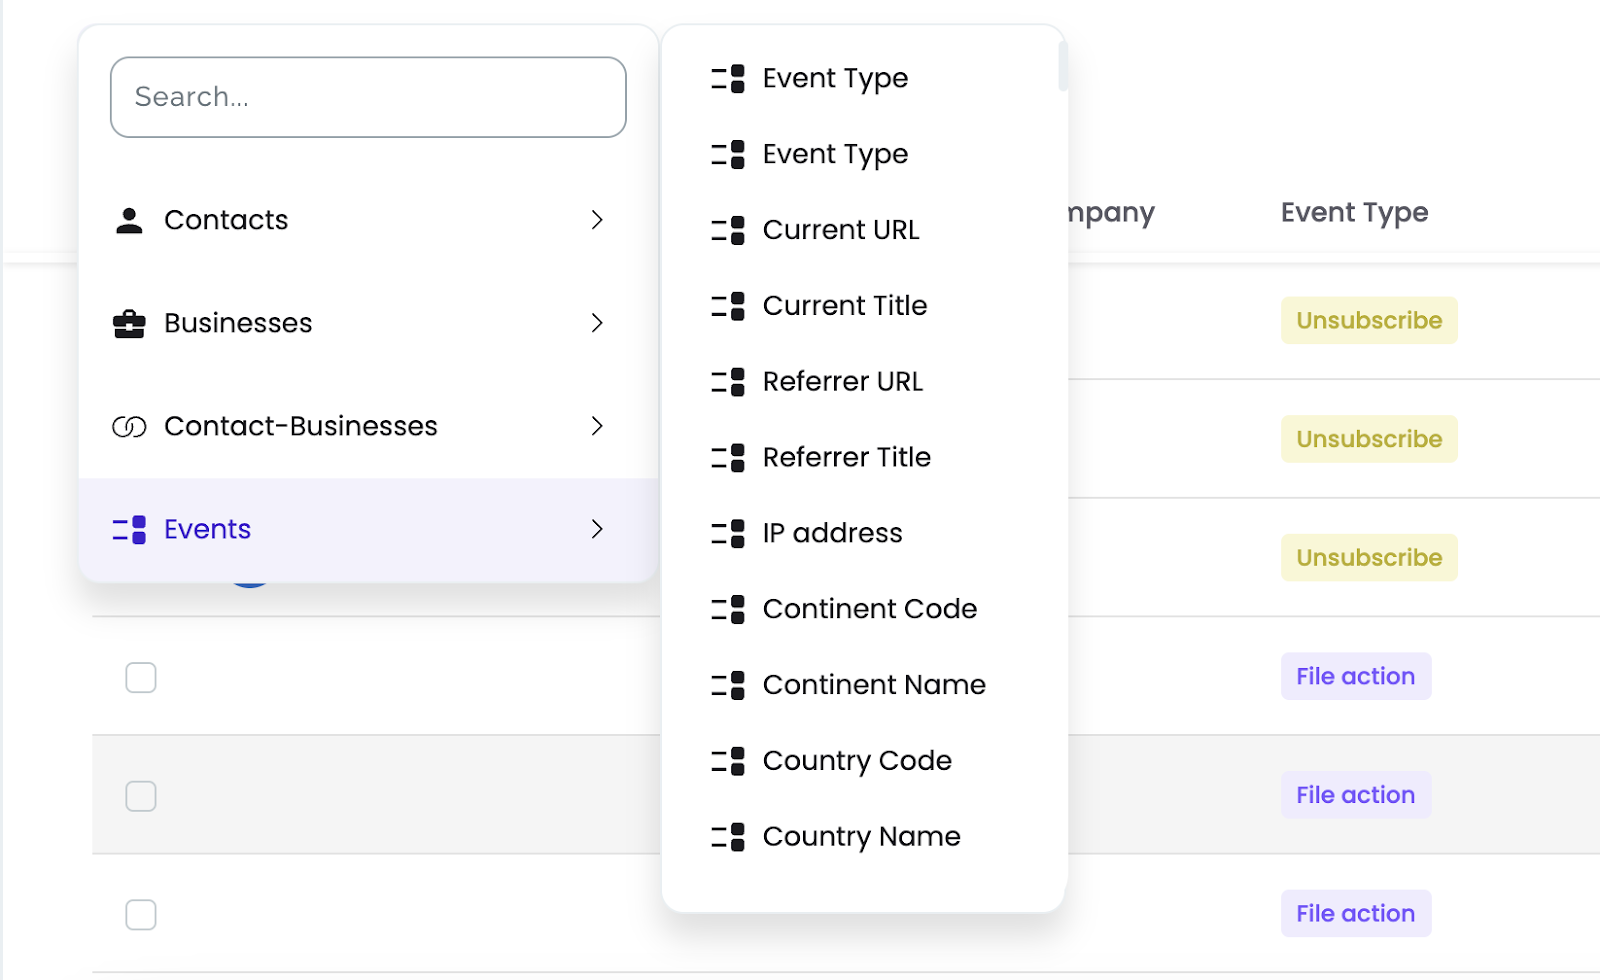
Managing Events
Track and manage events associated with your contacts:
Check Events:
- Go to the Events option to check out the first events tracked by the actions you’ve taken.
- Use the Filters to search for any event you are curious about.

Handling Business Associations
Associate contacts with their respective businesses:
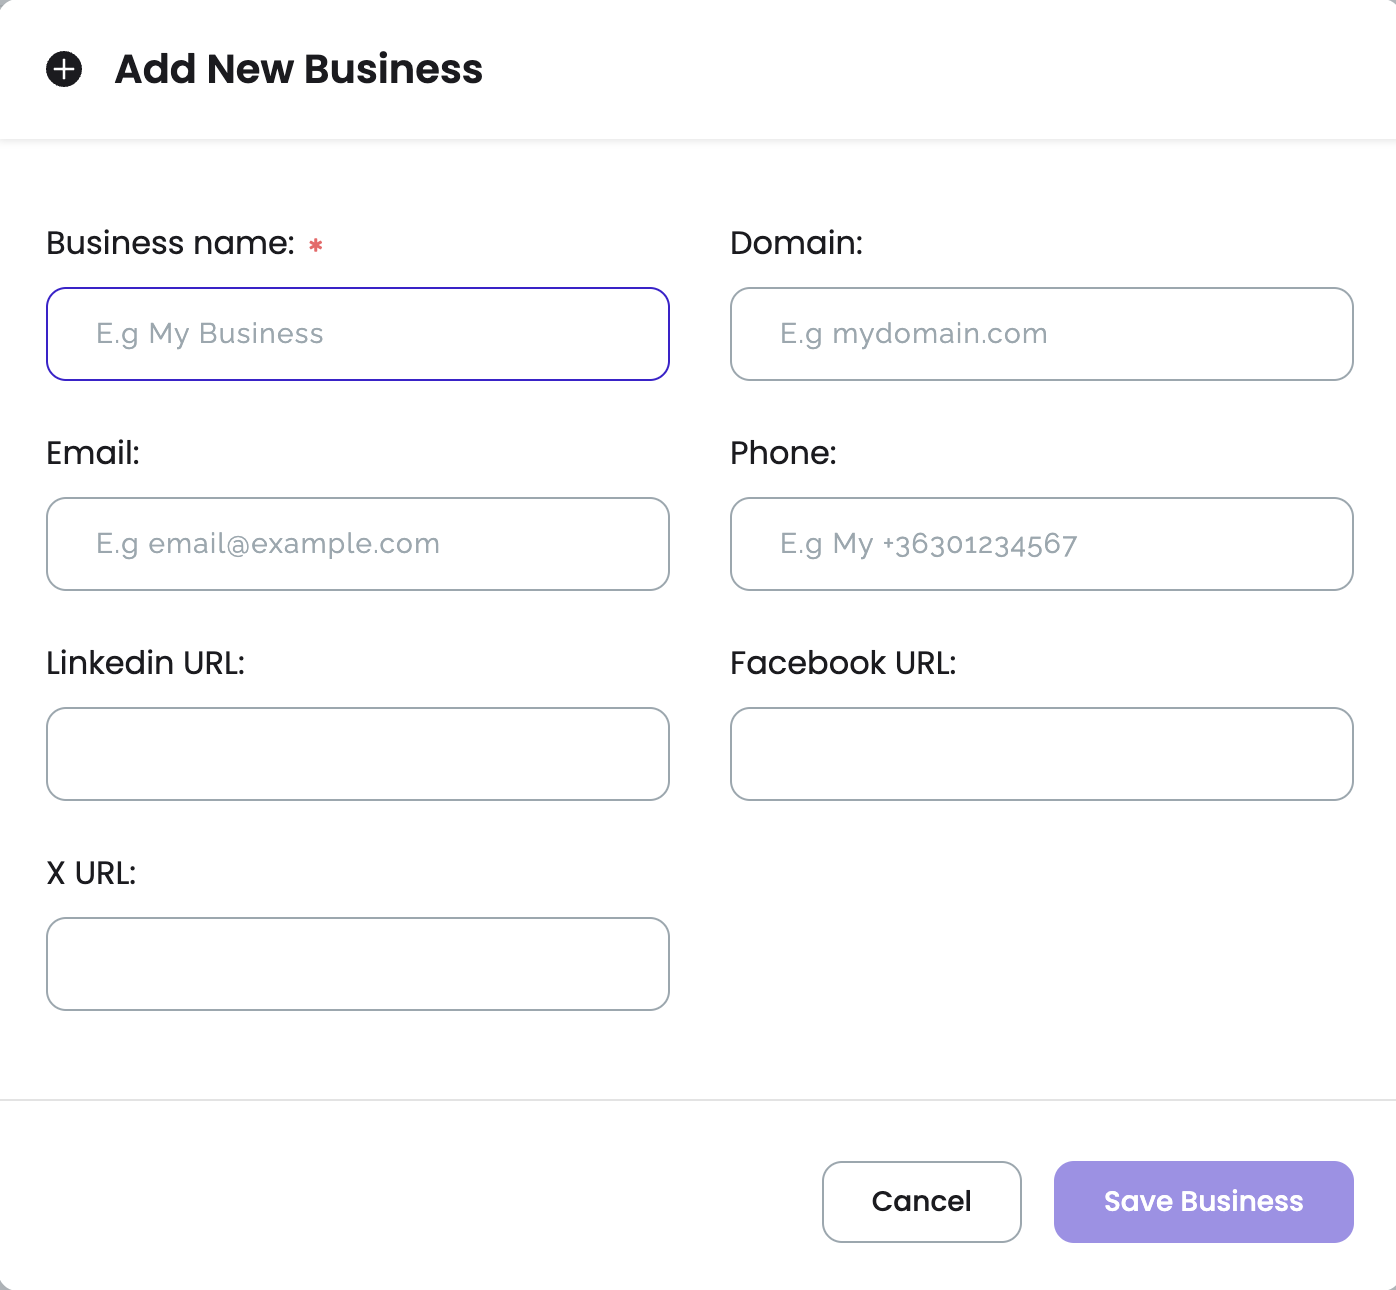
Add a Business:
- Open your contact in your Contacts list.
- At the bottom, under Related Business, click on +Add Business.
- Select +Add New Business.
- Enter the details of the business, including the name, email, domain, etc.
- Click on Save Business. Your contact will be connected to your business profile.
Edit Business Details:
- Find the business profile on your contact page under Related Business or in the Businesses option under Customers.
- Click on any data under Business Details to edit it.
- Enter the information and click on the tick icon to update the details.


